Configuration
Alarm Notification Profile
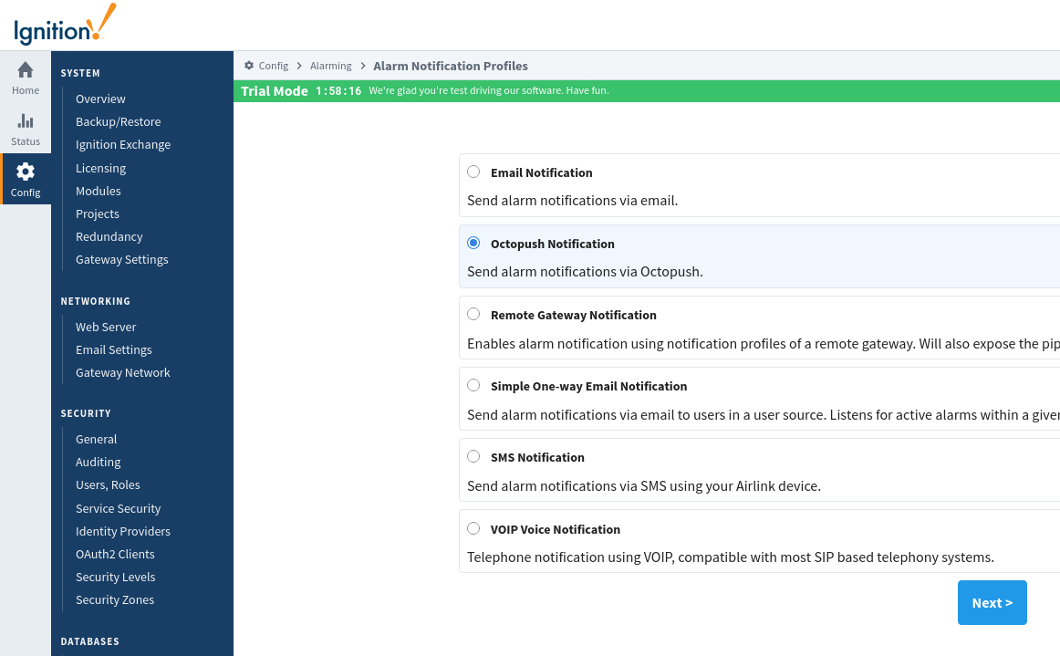
After installing the module, create an Alarm Notification Profile of type Octopush Notification.
Configure the Alarm Notification Profile with the following settings:
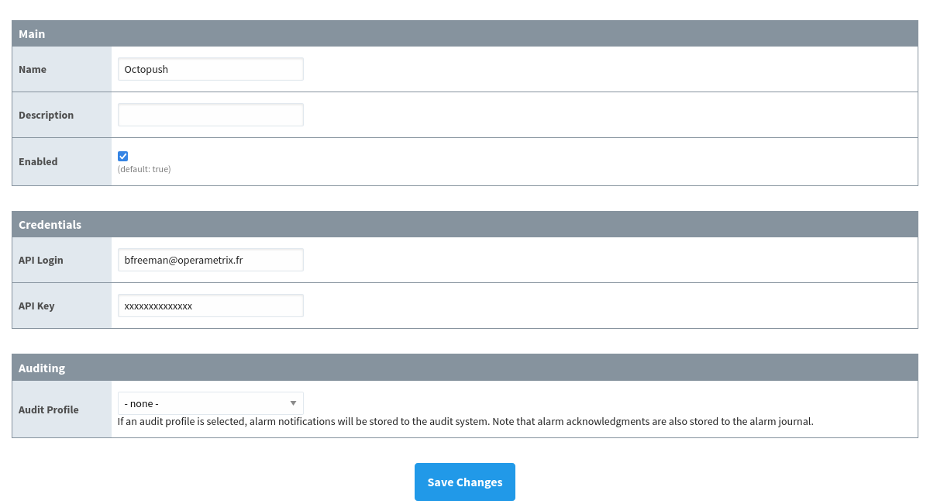
Main
| Parameter | Type | Description |
|---|---|---|
| Name * | Text | Name of the Alarm Notification Profile instance |
| Description | Text | Description of the Alarm Notification Profile instance |
| Enabled * | Boolean | Enable/Disable the Alarm Notification Profile |
Credentials
| Parameter | Type | Description |
|---|---|---|
| API Login * | Text | Octopush API login (found in your Octopush account settings) |
| API Key * | Text | API key provided by Octopush (found in your Octopush account settings) |
Log into your Octopush account at octopush.com and navigate to your API settings to obtain your API Login and API Key.
Auditing
| Parameter | Type | Description |
|---|---|---|
| Audit Profile | Dropdown | Optional audit profile to log all notification events |
When an audit profile is configured, the module logs:
- Notification send attempts
- Success/failure status
- Recipient information
- Alarm source and event details
* Required fields
User Contact Configuration
For users to receive Octopush notifications, their contact information must include phone numbers in the Octopush contact type.
- Navigate to Config > Security > Users, Roles
- Edit the user
- In the Contact Info section, add a contact of type Octopush
- Enter the phone number in international format (e.g.,
+33612345678)
Phone numbers must be in international format with the country code prefix (e.g., +33 for France, +1 for USA).
Per-Alarm Custom Message
The module supports per-alarm custom messages via the Extended Configuration of each alarm.
To configure a custom message for a specific alarm:
- Open the alarm configuration in the Designer
- Expand the Extended Config section
- Find the Octopush Notification Properties category
- Set the Custom Message property
When a custom message is defined, it overrides the notification block's message template for that specific alarm.
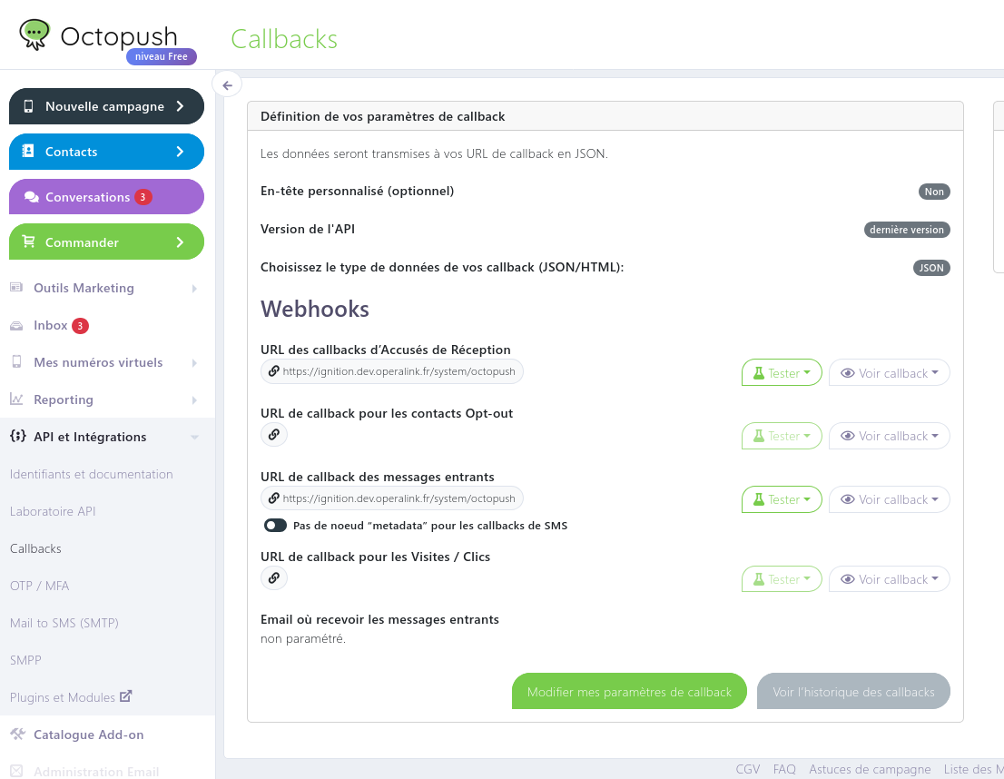
Octopush Callback Configuration
For acknowledgment functionality, configure webhooks in the Octopush admin interface.
Callback Types
| SMS Type | Callback Type | Description |
|---|---|---|
| Text SMS | Incoming messages | Receives SMS replies containing acknowledgment codes |
| Voice SMS | Delivery receipts | Receives keypad input from voice calls |
Configuration Steps
- Log into your Octopush account
- Navigate to Settings > Webhooks (or Callbacks)
- Configure the callback URL:
https://[your-ignition-server]/system/octopush
- Set the HTTP method to POST
- Enable the callback for the appropriate message type
Webhook Payload Format
The module expects JSON payloads with acknowledgment codes in one of these formats:
For SMS replies:
{
  "text": "12345"
}
For Voice keypad input:
{
  "meta_data": {
    "pressed_keys_code": "12345"
  }
}
Acknowledgment management requires the Ignition server to accept HTTP POST requests from Octopush servers. Ensure your firewall and network configuration allow this traffic.